Fitting porometry files

Contents
The initialisation step after opening the experimental data file, allows the user to choose parameters to model the experimental data file with. In the initialisation tutorial we are going to use the default simplex settings to model the experimental data. We are going to use the default unit cell size of 10 x 10 x 10. It is possible to run a fitting calculation up to 30 x 30 x 30 on the PoreXpert Cloud servers. Increasing the size will slow down the simplex fitting, however larger unit cells allow more realistic simulations of other properties such as permeability. It is also possible to fit a cuboidal unit cell with PoreXpert Professional and PoreXpert Cloud, by adjusting the sliders in the dimensions sub menu manually.
The fitting screen should look like the following image when running the Cellulose Nitrate data file. If you want to use the capillary bundle structure type please follow the capillary bundle tutorials. If you want to find out more about the dimensions or advanced drop down menus they are covered in more detail in the initialisation tutorial.
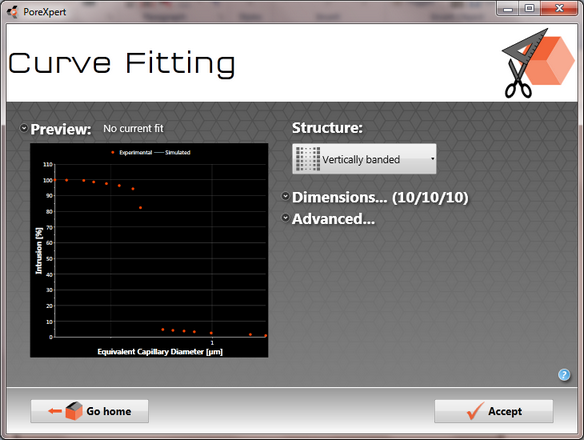
The left hand side of the screen previews the experimental porometry data which has been converted into a format similar to mercury porosimetry data. A major difference between the mercury porosimetry data and the porometry data is the use of a different intrusion fluid, which is air, displacing a wetting fluid. The screen displays a plot of the porosity against the Laplace diameter calculated using the air intrusion fluid properties.
The right hand side of the screen above allows you to choose a structure type that represents the experimental sample by default PoreXpert uses a vertically banded structure. The next section of the screen allows the dimensions of unit cell to be changed, the maximum size is dependent on the version of the software you are using and the capabilities of your computer. Smaller unit cells are good for deciding what structure type to use with the software.
We will not be changing the advanced properties for the simplex in the tutorials, explanations of the advanced parameters can be found in the explanation of the simplex fitting operation.
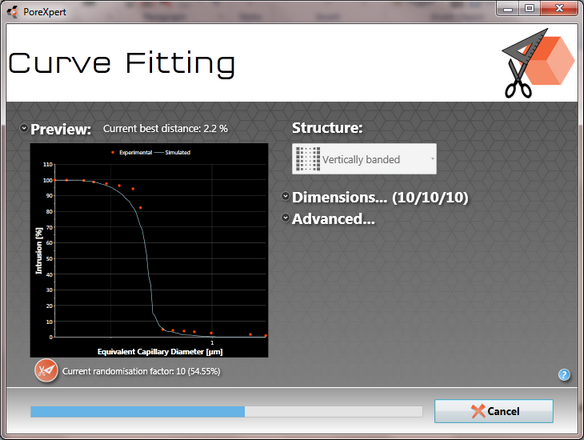
The next step is to press the Accept button which will start the simplex fitting operation, which goes through different stages. the first stage is to create the best fit, the next stage determines a starting grid, and then the simplex anneals to find the optimum fitting distance. Larger unit cells take longer to fit, we recommend if you are using unit cells larger than 15 x 15 x 15 that you use the PoreBatch facility. The next screen shows the progress of the simplex fitting operation with the current best fit displayed on the graph and the distance quoted above the preview.
Once the simplex has found the optimum fitting distance for your porometry data, the software is ready to build a unit cell. The building operation and various cell viewers are covered in the building section of the initialisation tutorial.
After fitting any structure before you can compare the properties the unit cell needs to be built.